Dental Photography is one of the most overlooked but massively important aspects of dental esthetics. It can get a little tricky if you are not an expert photographer.
So, we wanted to make life easier for you by providing you with the secret settings that will dramatically improve your dental photography. You don’t need to be an expert and you don’t need to watch hours of YouTube tutorials to understand how to work your camera. Just follow these simple proven steps by our educators to get the perfect picture.
First things first:
Shoot important images in “RAW” format
Most of the academic organizations require you to submit cases with the images in RAW file format. You need to utilize this setting especially when you’re using this images for shade evaluation.
Camera Settings (FIXED)
Aperture priority:
“A” in Nikon and “Av” in Canon
White balance:
Set to “K”
– And then set the camera, or the white balance settings to 5500K or the closest you can get.
ISO:
200 is safest, but if you’re images are consistently too dark you can set the ISO all the way up to 400, this would make your camera twice as sensible to light.
Color Gamut:
Adobe 98 (Adobe RGB), this will allow the camera to see a greater volume of colors, a little bit closer to what the human eye can actually see.
Depth of Focus
The Depth of Field, also known as Depth of Focus is what controls whats in and out of focus.
To control this, we’re only really gonna deal with the Aperture settings.
Macro or close up photography (1:1 or 1:2) or close up images of the teeth:
f32 (or largest f stop- some lens go to f57)
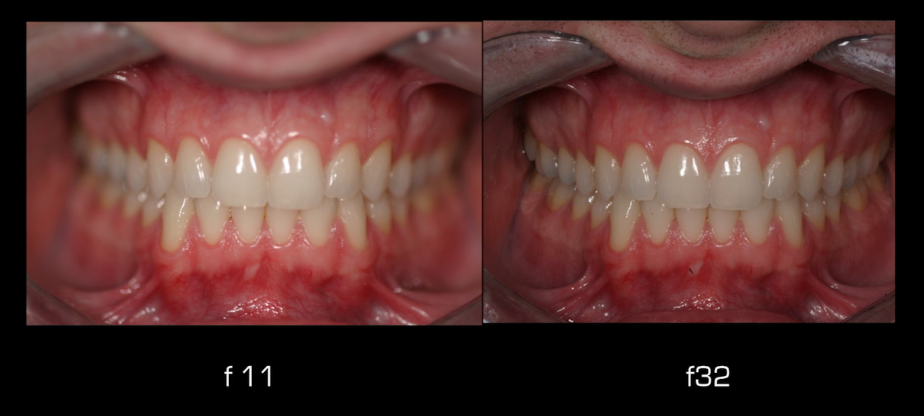
As you can see in the picture above, when we set the camera to f11 we can see that only really the center incisors are in focus and that’s not what we want in dentistry. Might be kind of artistic, but that’s not what we’re looking for.
On the other hand, we can see that the image on the right was taken with an f32 apreture and we can see all the teeth in focus, just the way we need it.
For portraits
f8 ( f5.6 is also ok)
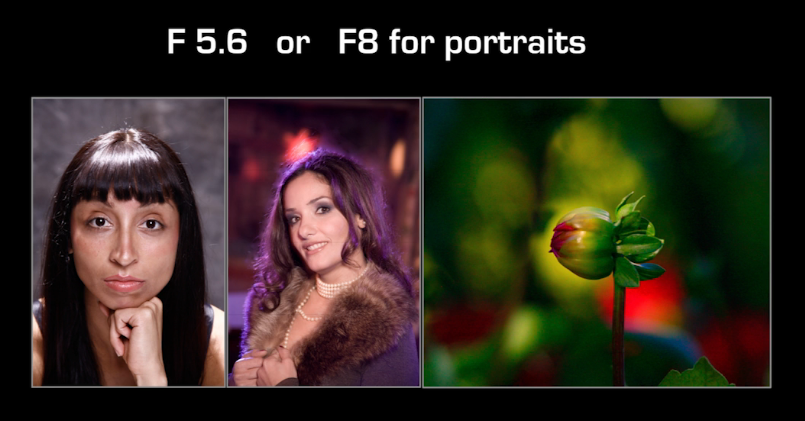
If you want a portrait with everything on foucs you should go with F8. But when you want a more artistic portrait you can set the camera to F5.6, this will make the back of the hair out of focus along with anything on the background. As you can see in the image of the flower, which was taken with an F5.6 aperture, the background is completely out of focus, so we get that pretty interesting effect.
GET FREE INSTANT ACCESS TO THE ONLINE COURSE
The exposure
The other thing we need to control is the exposure. This controls the lightness and darkness of the image. There are several ways to control this, but the easiest way is with the Ev Setting (+/- dial).
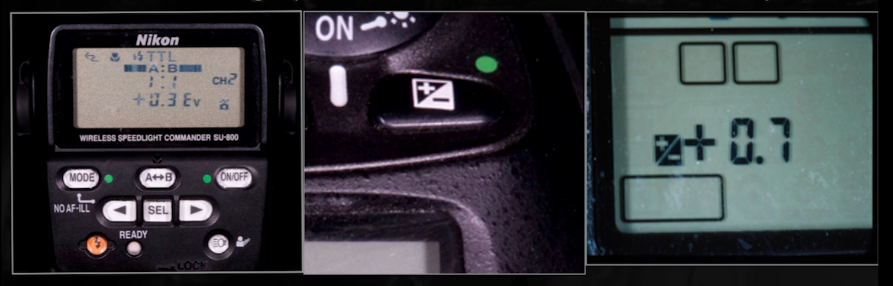
What you do is you change that setting to + or – deppending on the exposure you need.
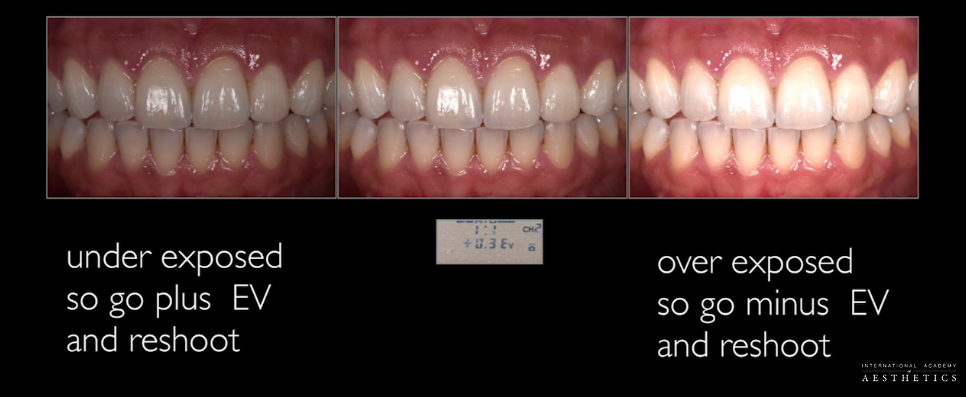
As you can see in the image above, when we get a image like the one on the left, we need to go + on the exposure so it lights up. And if we get an image like the one on the right, we need to go – on the exposure so it darkens a little. And, if we get an image like the one in the center, then we don’t need to change anything.
Newer Cameras
If you happen to have a Nikon D7000 or D7100, or a Canon 60D or 70D you can save custom profiles inside your camera.
For macro photography
For Nikon D7000 / D7100 set the U1 (user one)
For Canon 60D / 70D set the C (custom)
- I use Aperture Priority
- I use the largest F stop my lens will go (F57, or F32 for non digital lens)
- I use “adobe RGB” color model
- I use ISO 200 (400 is also OK)
- I use the “K” setting for color temp and set to 5500K
- Set file type to “RAW” especially for shade taking>
The Canon cameras only have one custom setting, but for those who have one of the two Nikon cameras we mentioned before, you can set a second custom setting.
For portrait photography
- I use Aperture Priority
- I use the smallest F stop F8 (F5.6 is ok)
- I use “adobe RGB” color model
- I use ISO 200 (400 is also OK)
- I use the “K” setting for color temp and set to 5500K
- Set file type to “RAW” especially for shade taking